Sure, here’s a point-based tutorial on how to add different types of DNS records (TXT, MX, A, etc.) to a DNS server through the control panel:
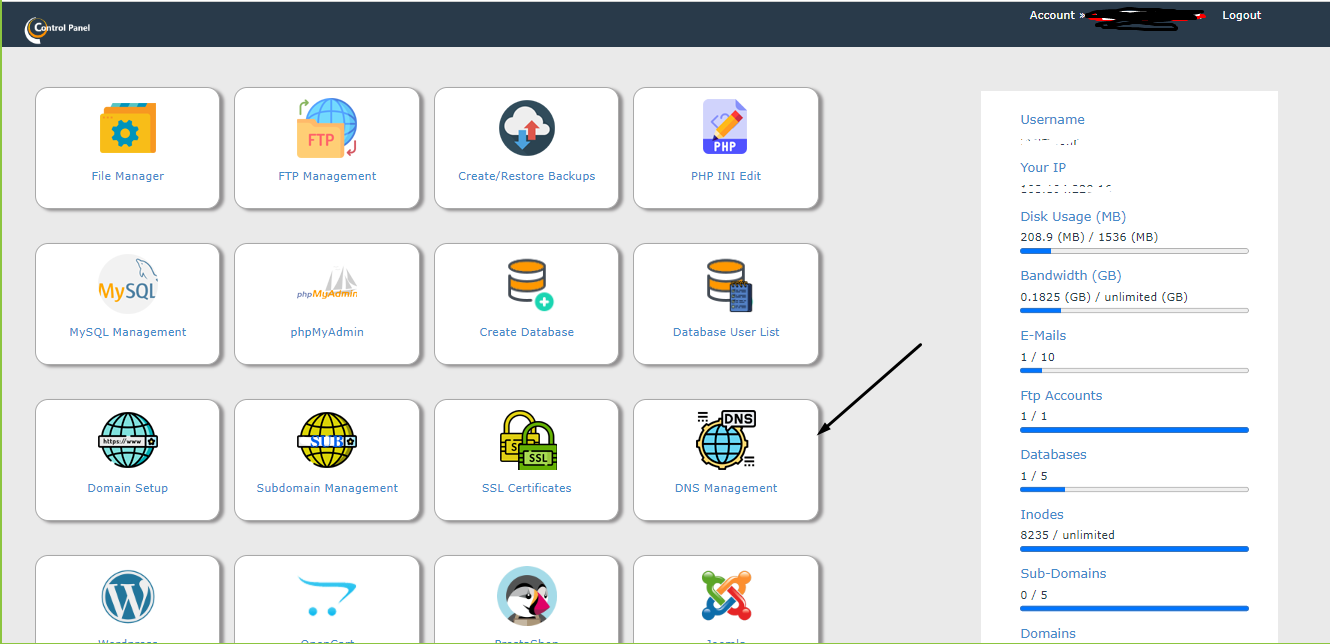
- Login to Control Panel: Log in to your control panel using your credentials.
- Access DNS Management: Navigate to the DNS section of your control panel. Look for the option labeled “DNS Management” and click on it.
- Scroll Down to Records: On the DNS Management page, you will find a list of existing DNS records. Scroll down to find the area where you can add new records.
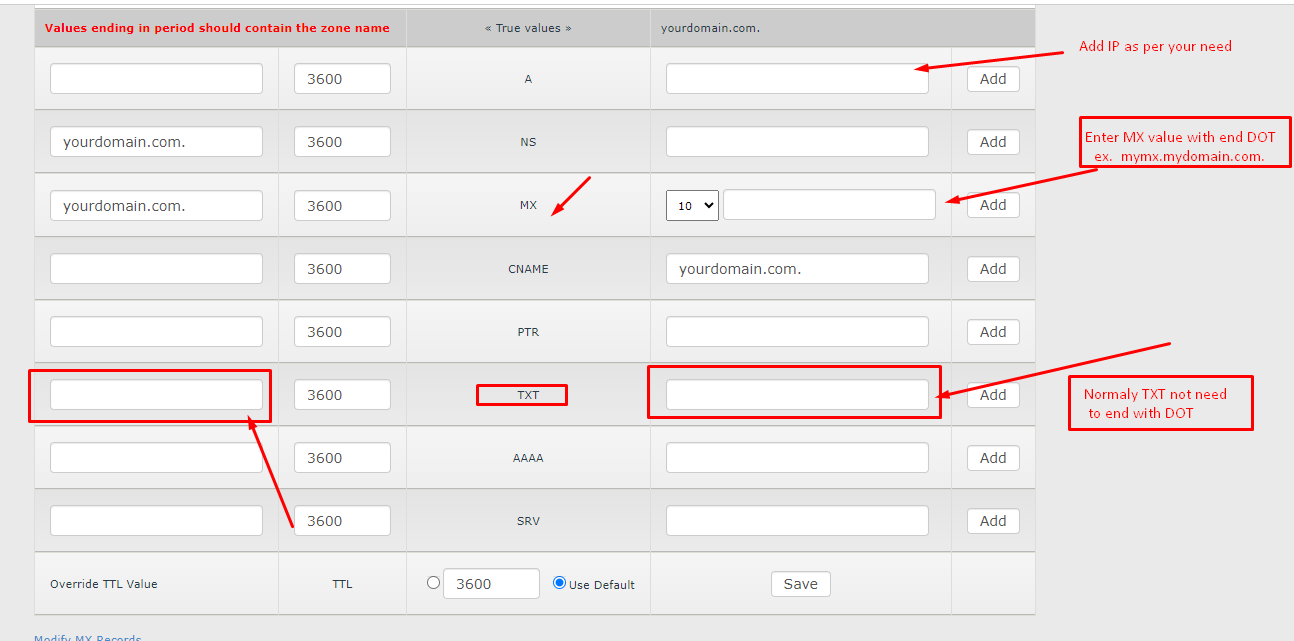
- Add TXT Record: To add a TXT record, locate the option to add a new record. Choose “TXT” as the record type. Enter the necessary details such as the record name and value. If the value ends with a domain or subdomain (e.g., .zmverify.zoho.in), Some time its not need to end with dot
- Add MX Record: For an MX record, select “MX” as the record type. Enter the priority and the mail server domain. The priority determines the order of mail servers when sending emails. On this case you must end record with dot
- Add A Record: To add an A record, select “A” as the record type. Enter the hostname (subdomain) and the corresponding IP address.
- Other Types of Records: Depending on your needs, you can add other types of records like CNAME, SPF, SRV, etc. Choose the appropriate record type and provide the necessary information.
- Save Changes: After entering the details for the record you want to add, don’t forget to save your changes. Look for a “Save” or “Add Record” button.
- Deleting Records: If you want to delete a record, locate the record in the DNS Management page. There should be an option to delete it. Confirm the deletion if prompted.
- Important Note: When entering record values, ensure you enter them correctly. If the value ends with a domain or subdomain, add a trailing dot (.) at the end of the value. This prevents any issues with resolving the record.
Remember that the exact steps might vary based on the control panel you’re using. The tutorial assumes a general process for adding and managing DNS records. Always double-check your entries before saving changes, and if you’re unsure about any step, refer to the documentation of your specific control panel.